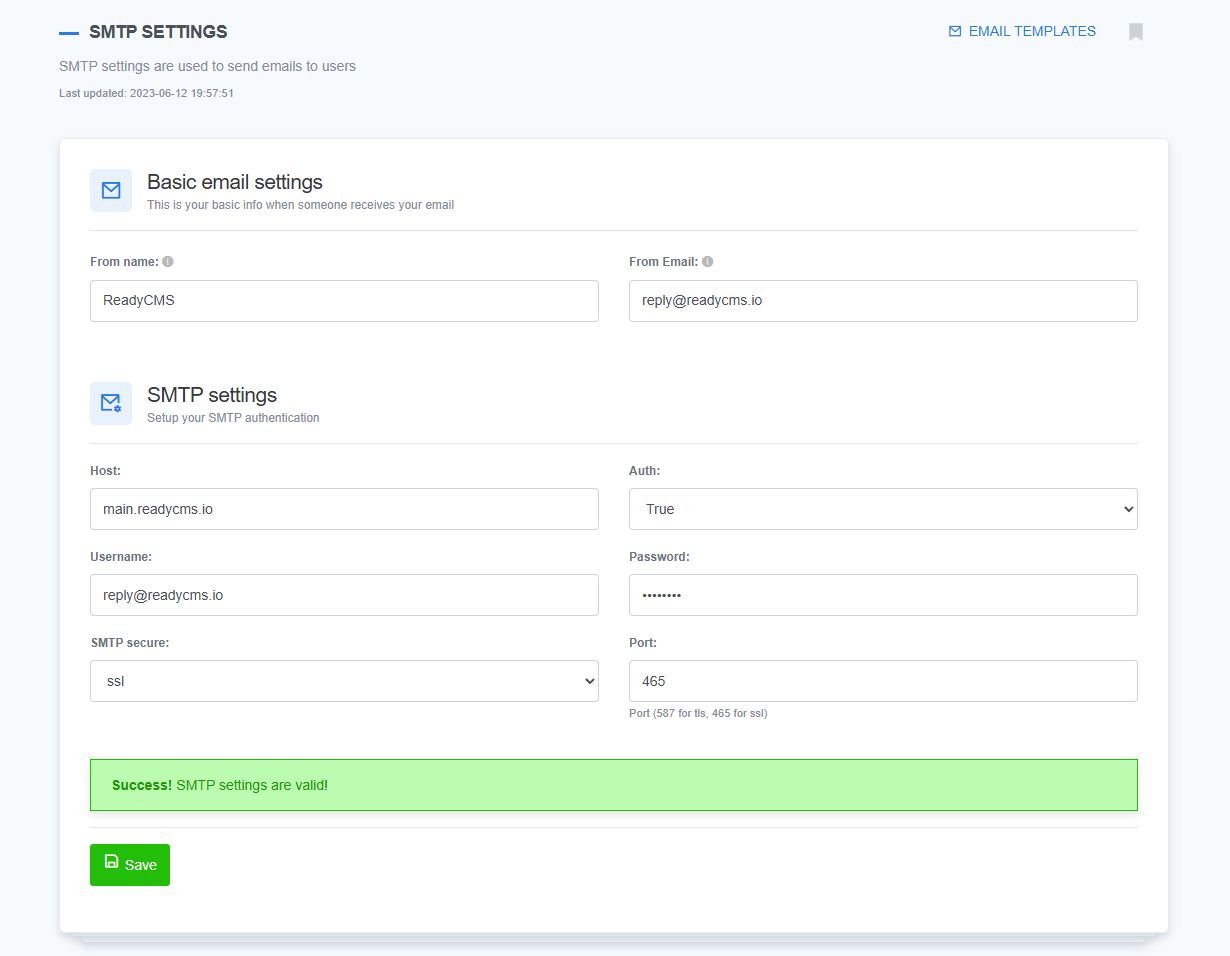
You can configure your own SMTP credentials for better deliverability or custom branding. This setup ensures emails from your store use your domain and comply with your provider's authentication rules.
What is SMTP?
Simple Mail Transfer Protocol is a connection-oriented, text-based protocol in which a mail sender communicates with a mail receiver by issuing command strings and supplying necessary data over a reliable, ordered data stream channel, typically a Transmission Control Protocol (TCP) connection.
How to set up SMTP settings?
These settings are important because ReadyCMS uses them to send all emails from the system to you, staff members, and customers.
- Go to: Open the SMTP Settings tab.

- Fill in: In the Basic email settings section, you need to enter your
From nameandFrom email(when someone receives an email from you, this info will be displayed)
Tip:'From name' can be the company name, or perhaps the product or service people have signed up to learn about.
- SMTP settings: SMTP is an internet standard, so you should configure the settings according to that standard.
- Host - In the Host text field, enter your server address
- Auth - Choose whether you want to activate your SMTP authentication.
- Port - Enter the
SMTP port(587 for tls, 465 for ssl). - Username - your email address
- Password - your email password or app-specific password
- Encryption (None, TLS, or SSL) - Choose the encryption type—
TLS(Transport Layer Security) orSSL(Secure Socket Layer) is recommended.
- SaveClick
Saveto apply your settings.
Tip:Remember to save your changes.
- Confirmation: If you entered all the correct information, a green message will appear: "Success! SMTP settings are valid!"
What's next?
After setting up your shop, we can go to the next topic: Manufacturers.
Previous topic: Disabling automatic emails