In a collaborative environment, ensuring the right access levels for each team member is crucial. ReadyCMS provides a robust permissions system, allowing administrators to fine-tune user access based on roles and responsibilities.
Managing permissions in ReadyCMS
When multiple individuals access your ReadyCMS subdomain, it's prudent to establish distinct client accounts for each person. This ensures that users can access necessary data without compromising sensitive information.
Tip: Assigning specific roles to each user enhances security and operational efficiency.
Permissions in ReadyCMS are categorized into action groups:
- View
- Create
- Edit
- Delete
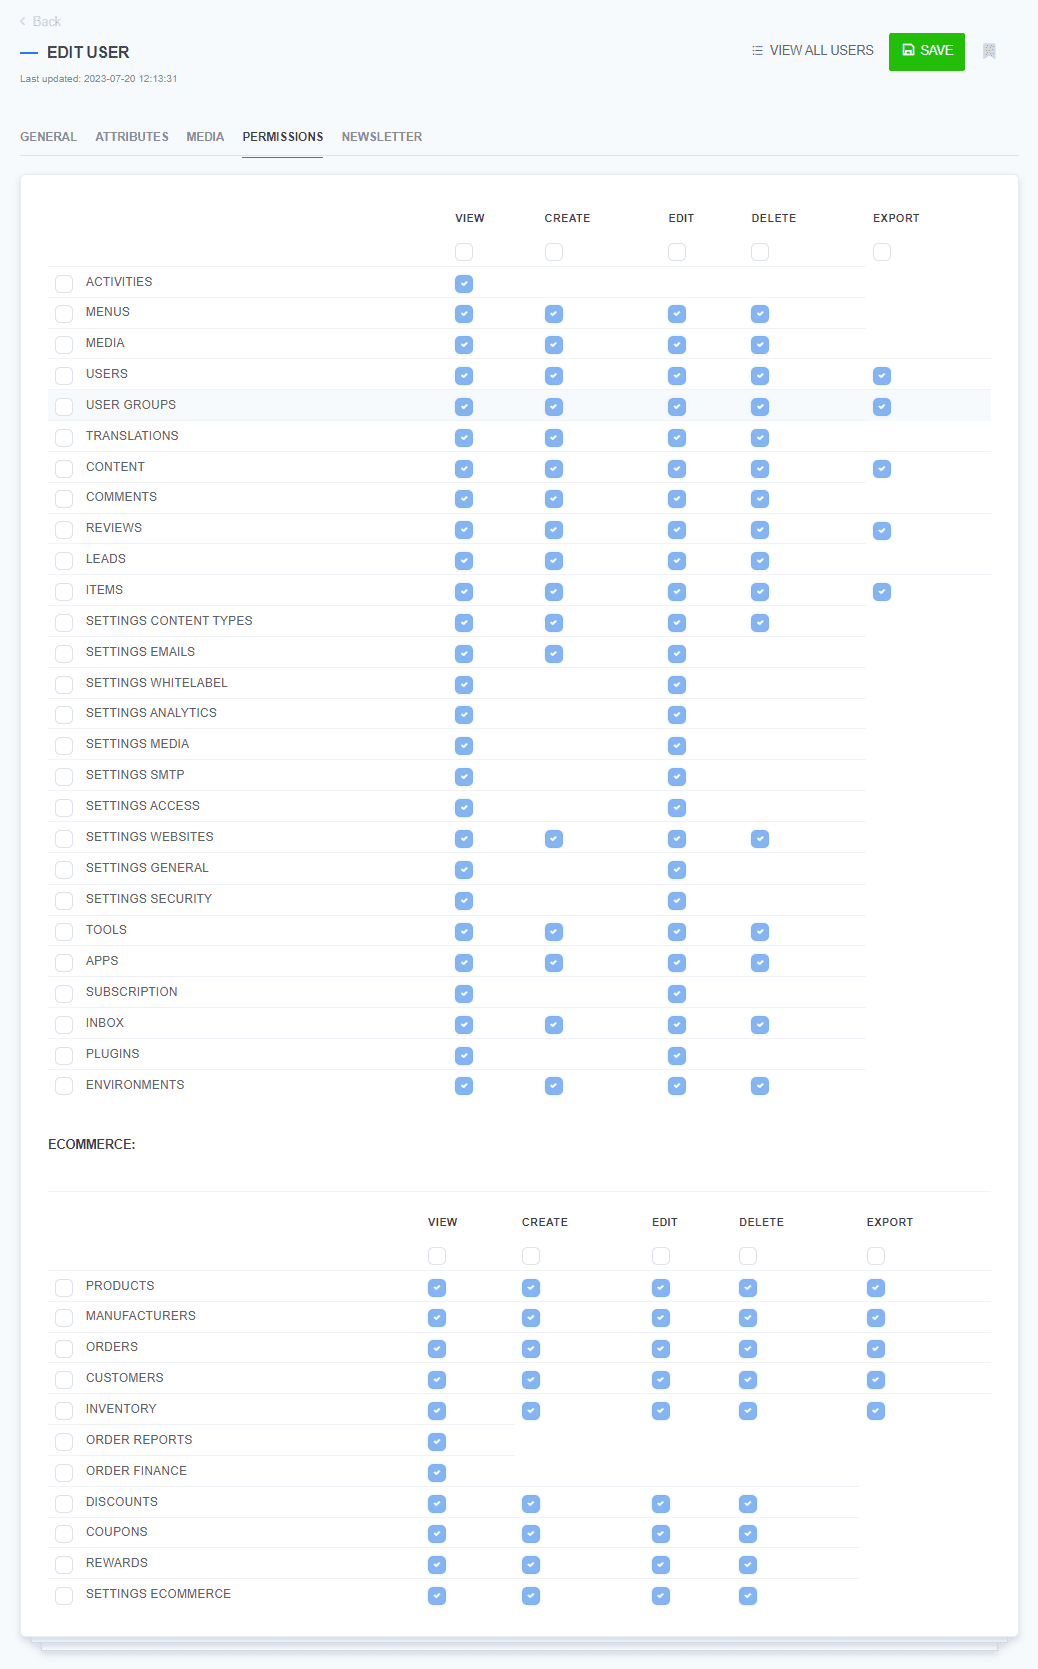
You can define permissions based on these action groups and specific content or data types.
Tip:
- Create a custom role for financial advisors, allowing them to view financial reports without granting broader system access.
- Design a store manager role with all necessary permissions for store operations, excluding financial report access.
By tailoring permissions, you can optimize operational efficiency, minimize administrative tasks, and reduce potential errors.
Setting user permissions
Follow these steps to assign or modify user permissions:
- Login: Sign in to your ReadyCMS account.
- Navigation: From the main navigation bar, select Users > All users in the Settings dropdown menu.
- User selection: Browse the list to find the user you wish to modify. Click the Edit button adjacent to their name.
- Permissions assignment: Navigate to the Permissions tab. Here, use the checkboxes to grant or revoke specific permissions for the user.
- Save changes: Confirm your adjustments by clicking the Save button.