In ReadyCMS, additional fields serve as a powerful tool for developers and content managers alike. They allow for the customization of data and the addition of functionalities without the need for code modifications. By utilizing additional fields, you can scale your data with key-value pairs, ensuring that your content is both dynamic and tailored to your specific needs.
Benefits of using Additional fields
- Flexibility: Customize your content types to fit the unique requirements of your website or application.
- Scalability: As your content needs grow, additional fields can easily be added to accommodate new data types or functionalities.
- Efficiency: Streamline the content creation process by only displaying relevant fields to content creators.
Example: If you're running an online store, you might want to add an additional field for "Product dimensions" or "Warranty period". This ensures that product listings are comprehensive and provide all the necessary information to potential customers.
How to manage Additional fields
- Sign in to ReadyCMS: Access your ReadyCMS account.
- Navigate to content type: In the main menu, select the content type you wish to modify, such as
Shop > ProductsorGeneral > Pages. - Access settings: Click on the cogwheel icon button next to your chosen content type to access its settings.
- Go to the Additional fields tab: On the
Edit content typespage, navigate to the appropriate tab for managing additional fields.
- Add or modify fields: Clicking on an empty field will provide options for customization.

- Enter the Label for the field, which will serve as its title.
- Provide a Description for clarity.
- Choose the Data type from a dropdown menu.

- Define the key-value pair using the
KeyandDefault valuefields.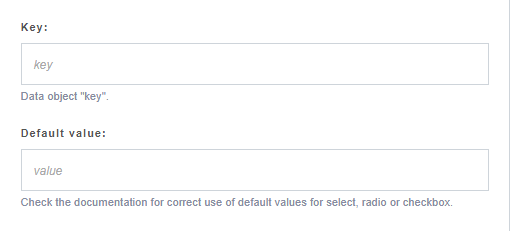
- Mark the field as required by selecting
This field is requiredcheckbox.
- Save changes: After setting up your additional fields, click the
Savebutton to confirm your modifications.
Note: All additional fields will be reflected in the API results, ensuring that your custom data is accessible for further integrations or applications.