You can assign an admin to a specific order. If the order requires special attention and processing, assign an admin to handle that task.
Assigning managers to orders allows you to distribute responsibility across your team and improve follow-ups, tracking, and communication. This feature is especially useful for large teams or businesses with multiple order handlers.
How to assign a manager to an order
- Sign in: Log in to your ReadyCMS account
- Navigate: Go to the
Shop>Orders>All orders - Select: In the Orders page, click on the
Editbutton (from the dropdown menu on the right side of the order)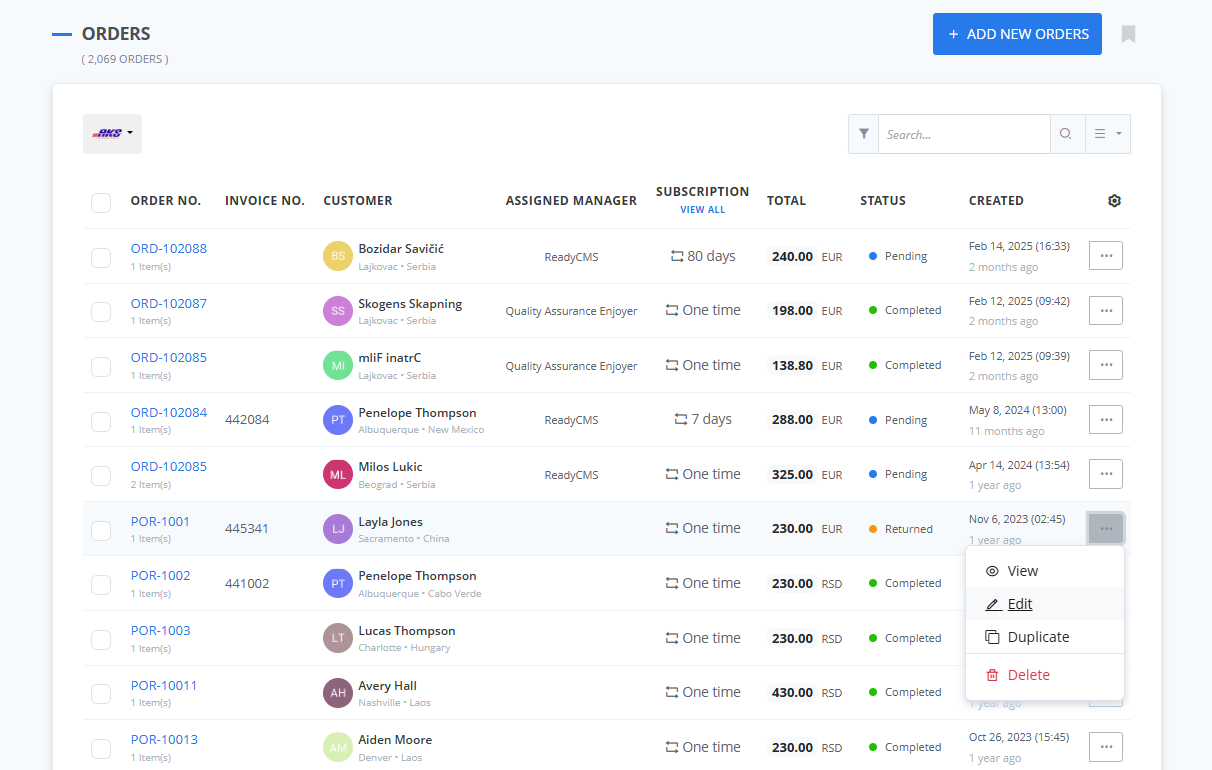
- Order edit page: Go to the Administration tab

- Assign: Here you can assign a manager to this order and add a comment about the order
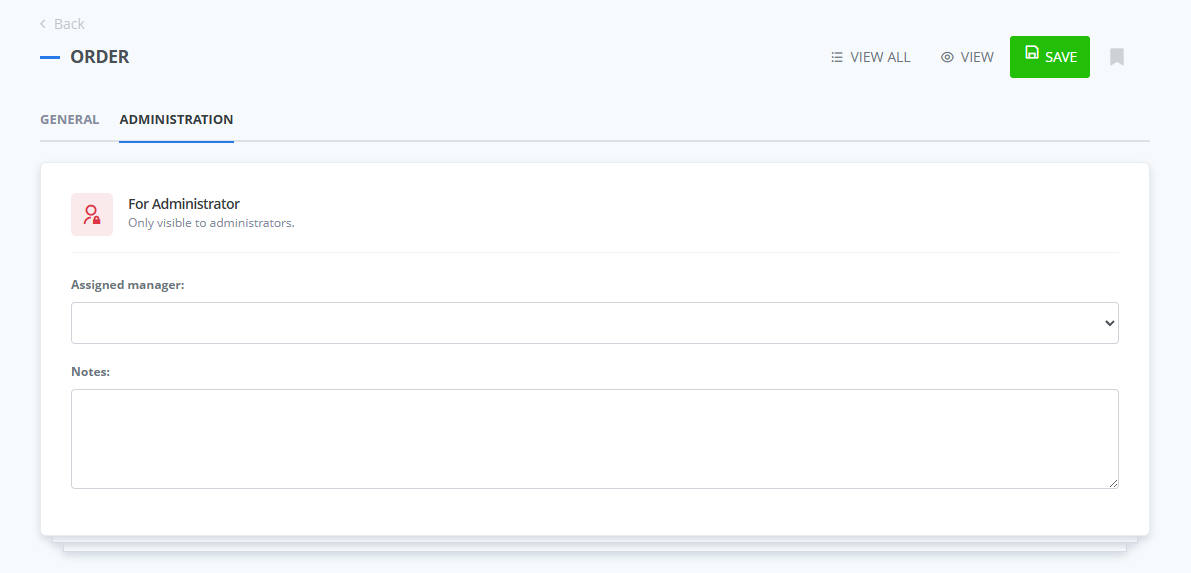
- Choose: Select the manager (admin) from the drop-down list

- Optional: Admins can write notes and comments related to this order in the
Notestext field - Save: Click the
Savebutton to confirm changes
Viewing assigned managers in the Orders list
You can now see assigned managers directly from the main Orders list view, making tracking responsibilities at a glance easier.

To see the assigned managers in the Orders list, you first need to enable the Manager column manually:
- Click the Edit columns button (gear icon on the top right of the list).
- Enable the checkbox next to Manager.
- Click Save to update the view.
Once enabled, the Assigned Manager column will appear in the list.
Note: This column will be blank if an order has no assigned manager.
Filter orders per assigned manager
ReadyCMS also allows orders to be filtered by the assigned manager. That way, you can track whether tasks are allocated equally per manager or whether some managers are having problems following the pace of the orders.

What's next?
Once you've assigned order responsibilities, you may want to explore how to manage those records further. Refer to the Deleting orders page to learn how to remove orders from your system.
Previous topic: Adding orders