Menus are a common user interface component in many types of applications. Their task is to improve user experience and to provide convenient access to various operations and content.
How to add a menu
To add the menu, take the following steps:
- Login: Sign in to your ReadyCMS account
- Navigate: In the Settings dropdown menu, go to
Menus>Add menu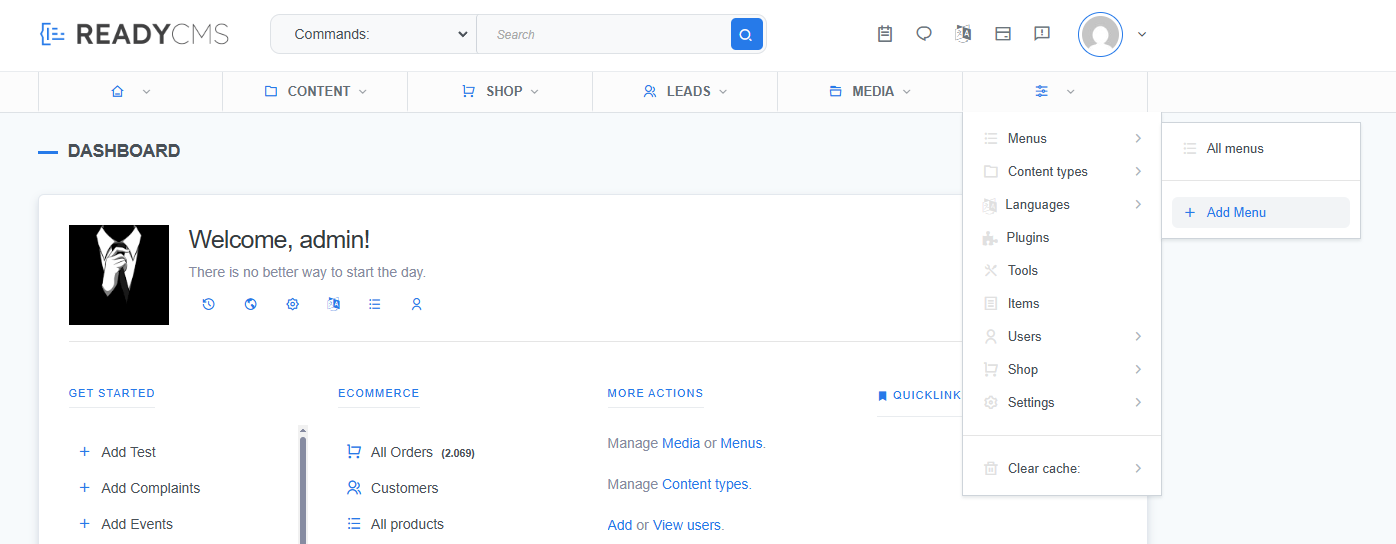
- Fill-in: On the Add menu page, enter the basic information
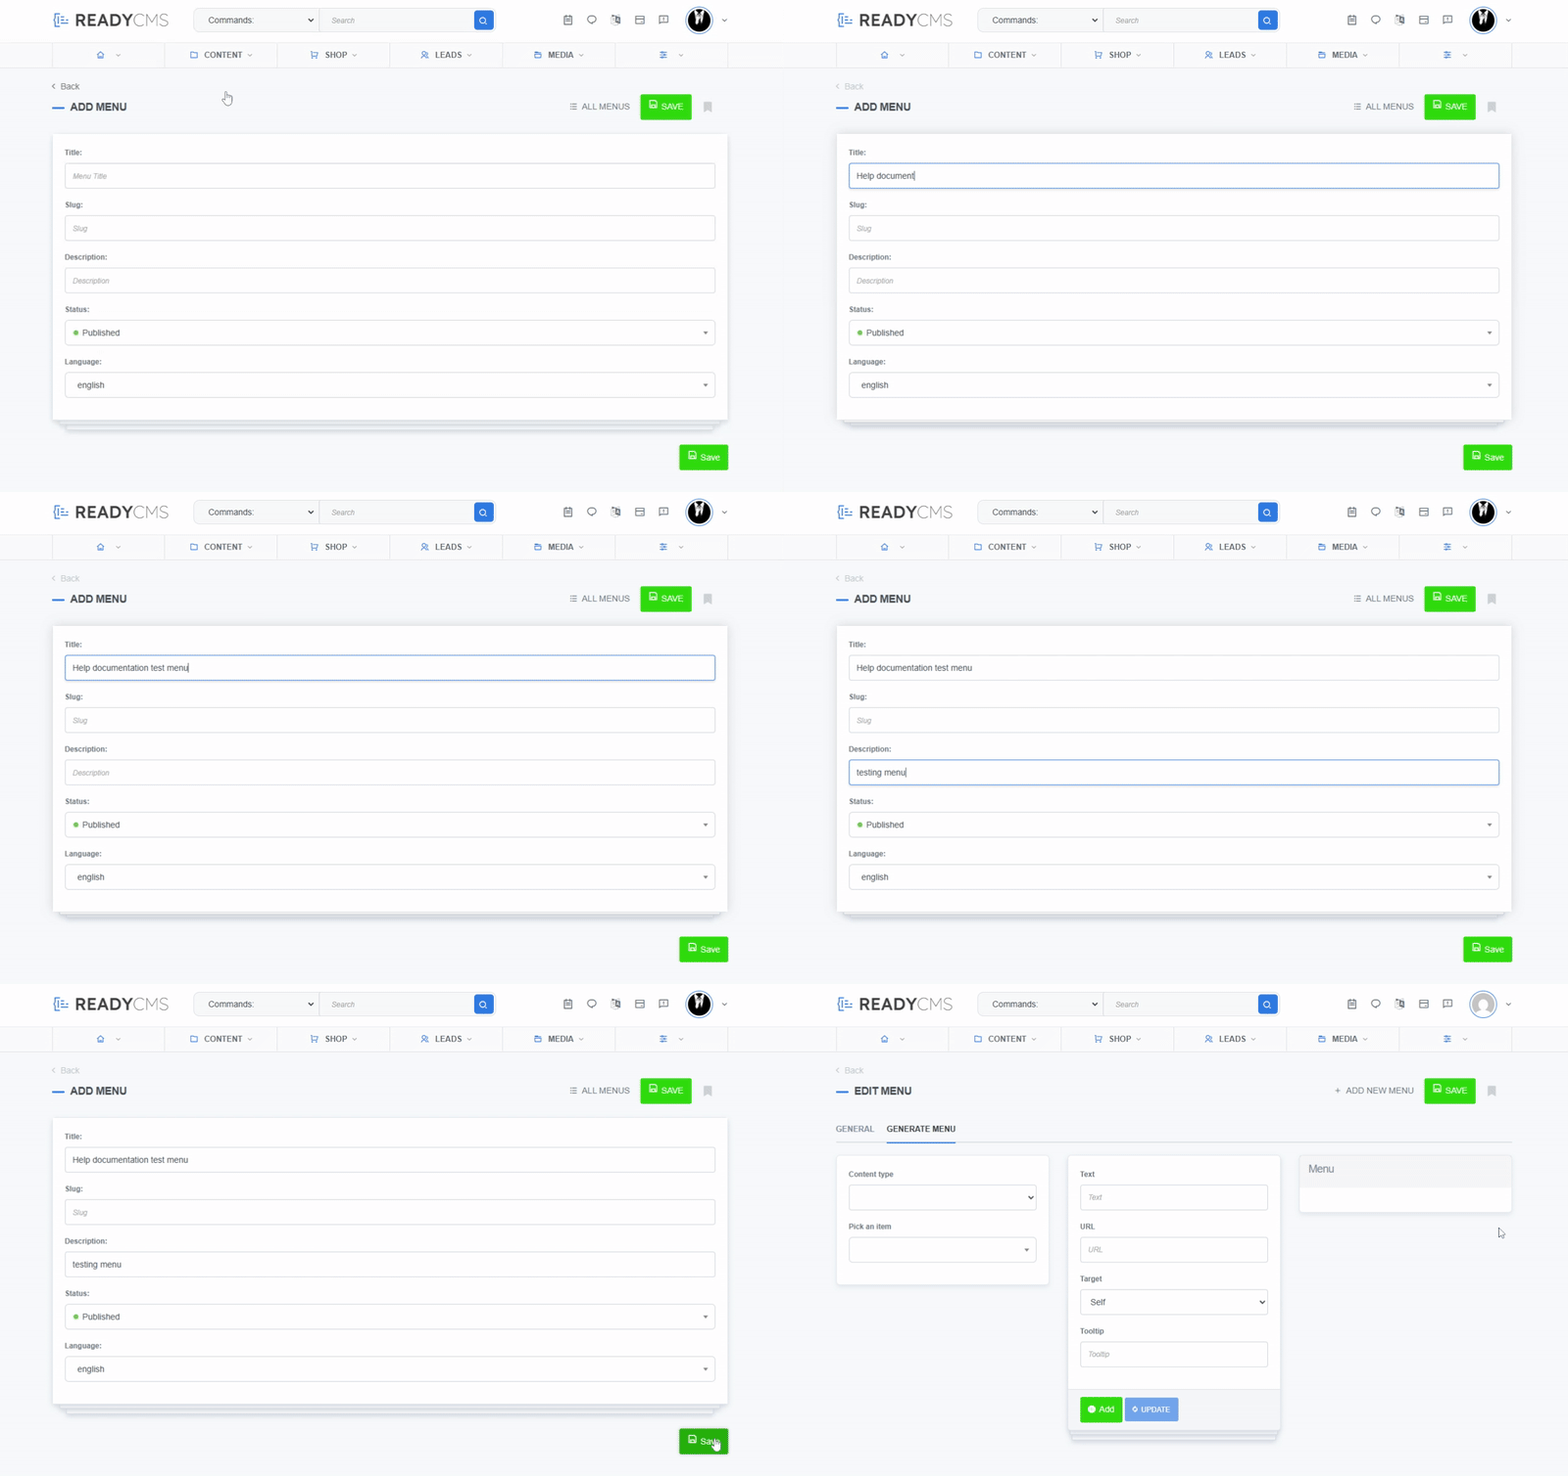
- Enter the title of the menu in the Title field
- (Optional) Enter the slug in the Slug field
If you don't enter the slug, it will be automatically generated after you save the menu.
- (Optional) Enter a short description of the menu in the Description field
- Set the status as
Published - Choose the language (All languages option is the default - it will generate all menu variations according to registered languages)
- Save: Click the
Savebutton to confirm the changes
After you create and save the menu, you can generate menu content.
How to generate a menu
- Edit page: After you finish all the steps and add a new menu, you will be redirected to the Edit menu page
- Add items: On the Generate menu tab, you can start adding menu items
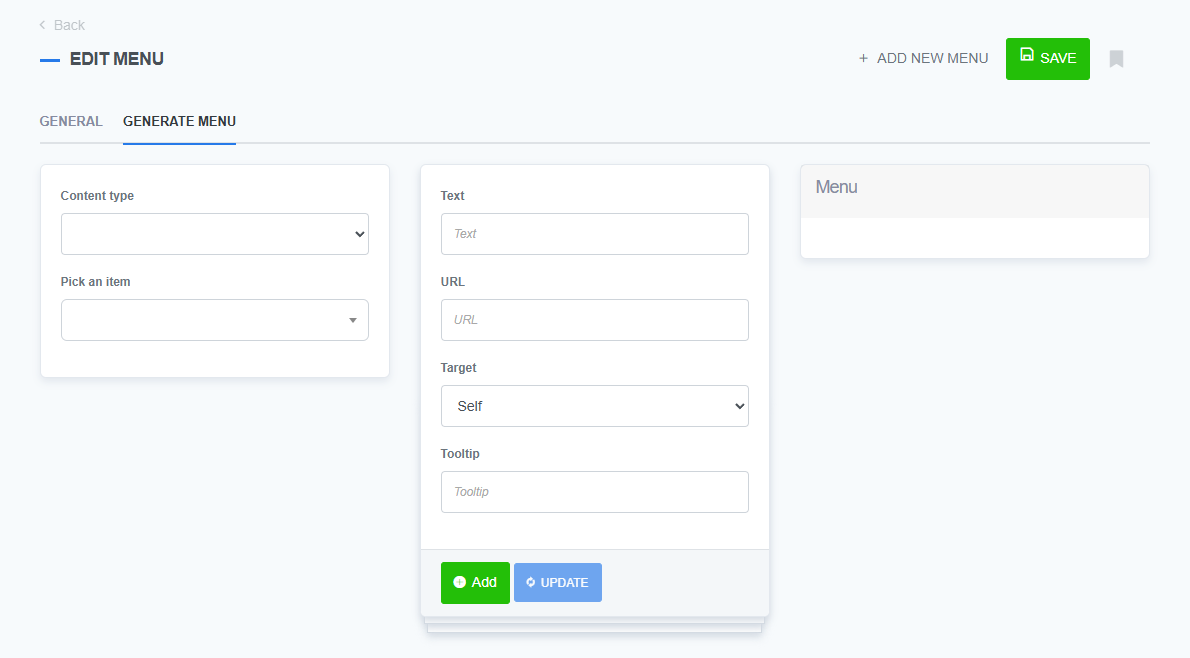
- Content type: On the left side of the Generate menu tab, you can choose the type of content and content item that you want to add to the menu
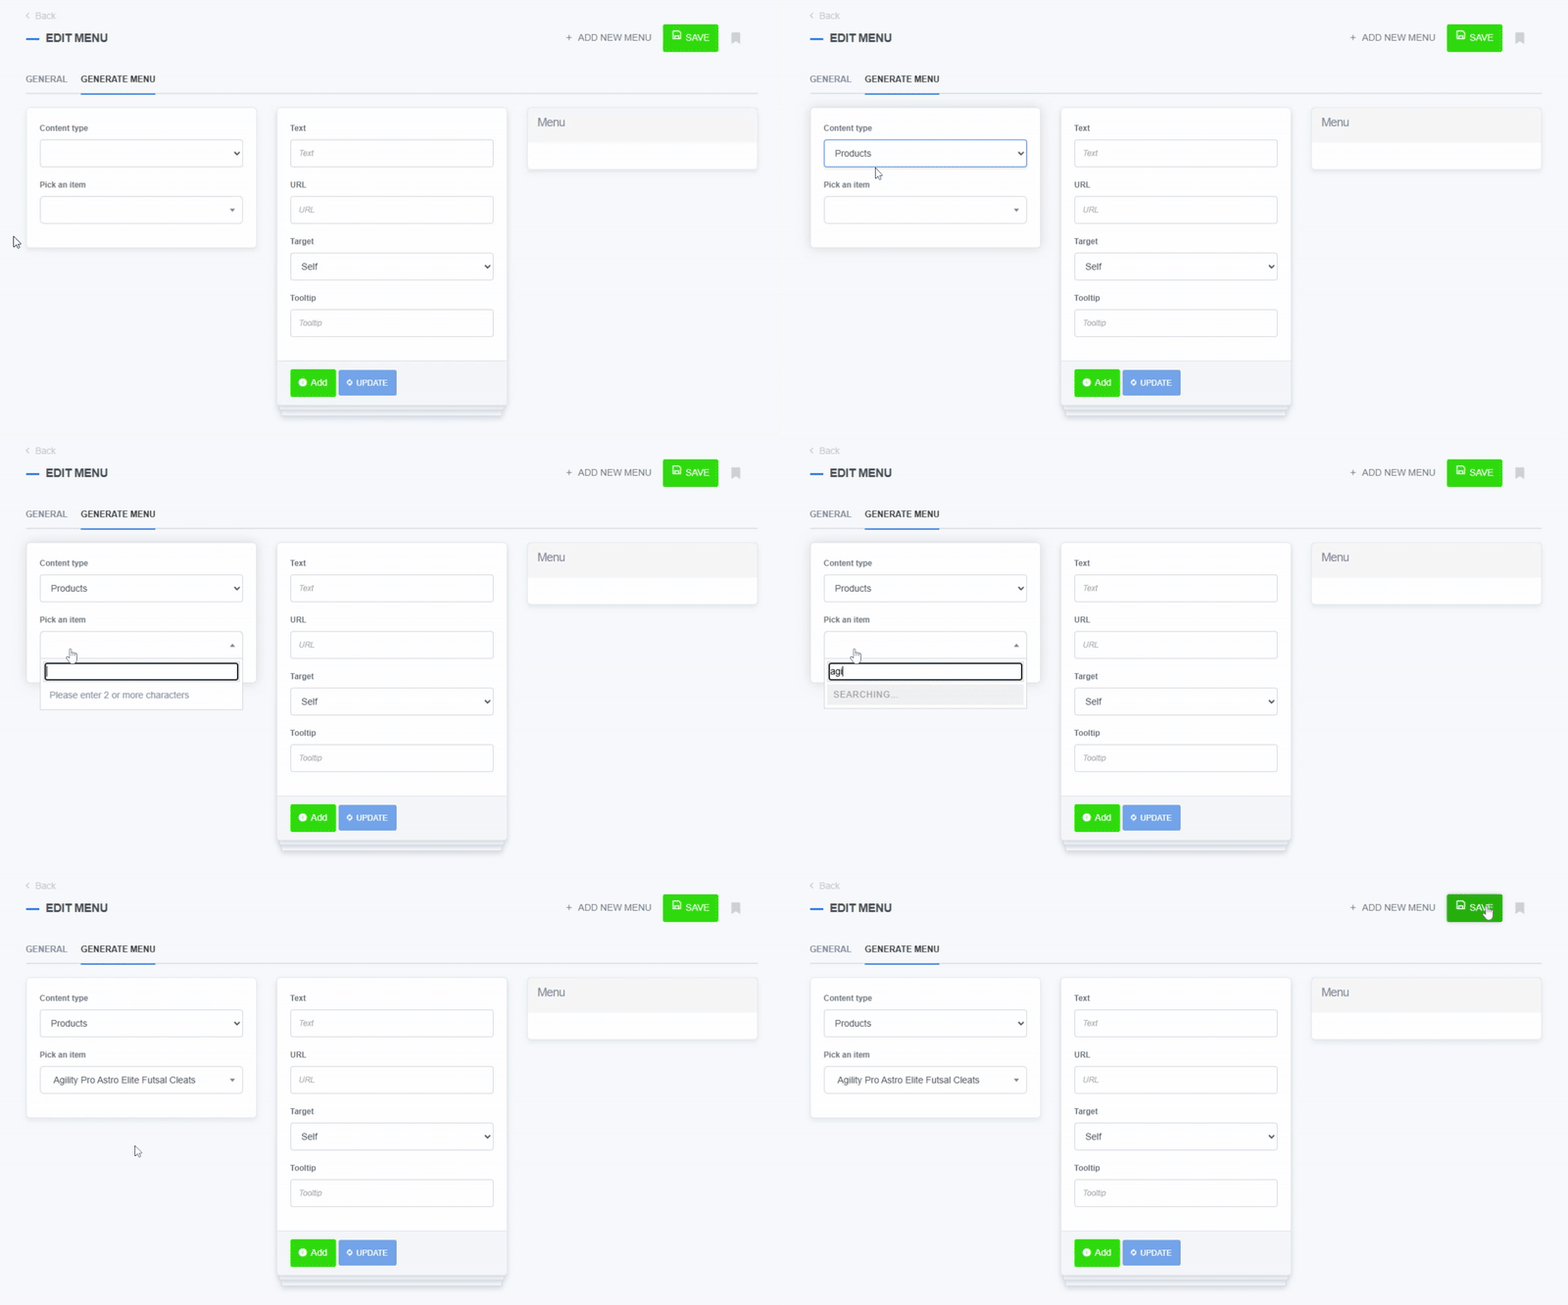
- Auto-fill: After you select the content, the Text field and URL field will be automatically filled
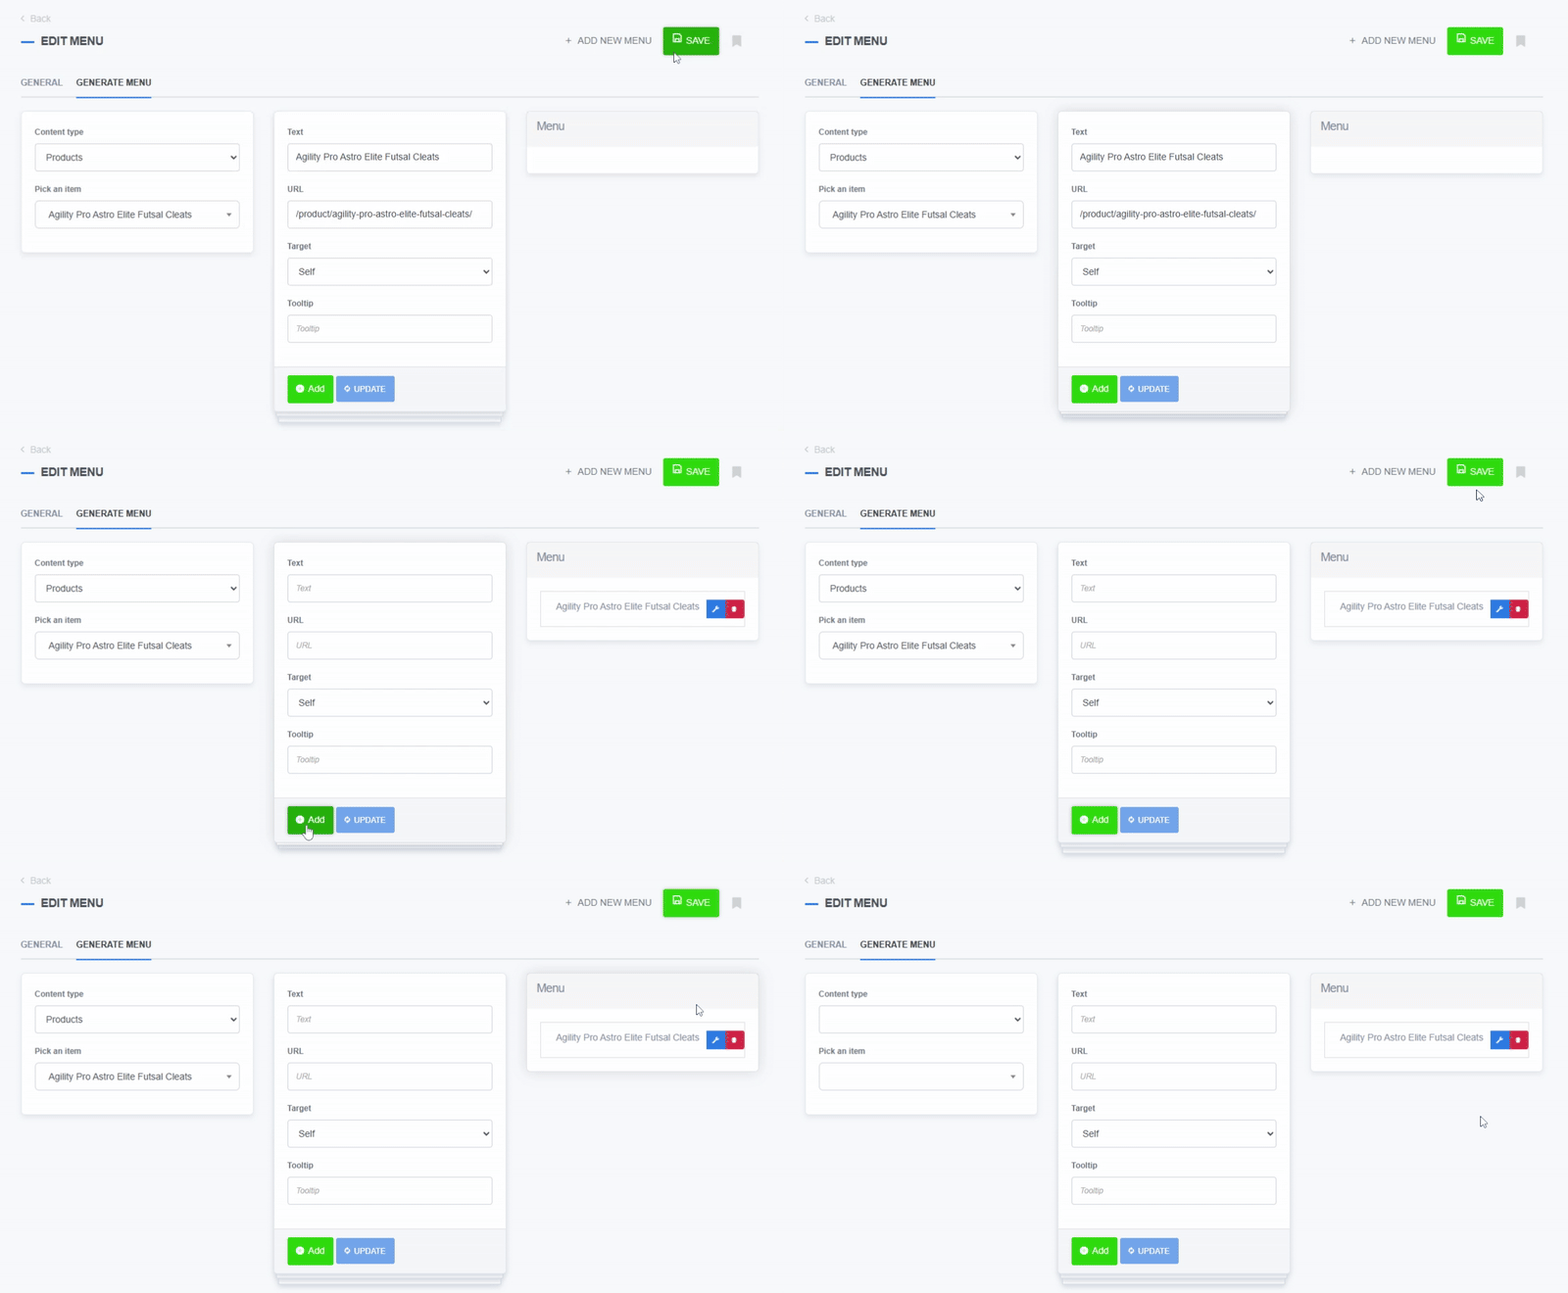
You can fill these fields (Text and URL) manually without choosing the content type and item, but you will need to know the exact URL of the desired content. - Add items: Click the
Addbutton to add the content to the menu on the right side - Drag&drop: You can move menu items in the menu list however you choose using the menu tools (up and down arrows, adding a submenu button in the shape of a star), or you can click and drag the menu item
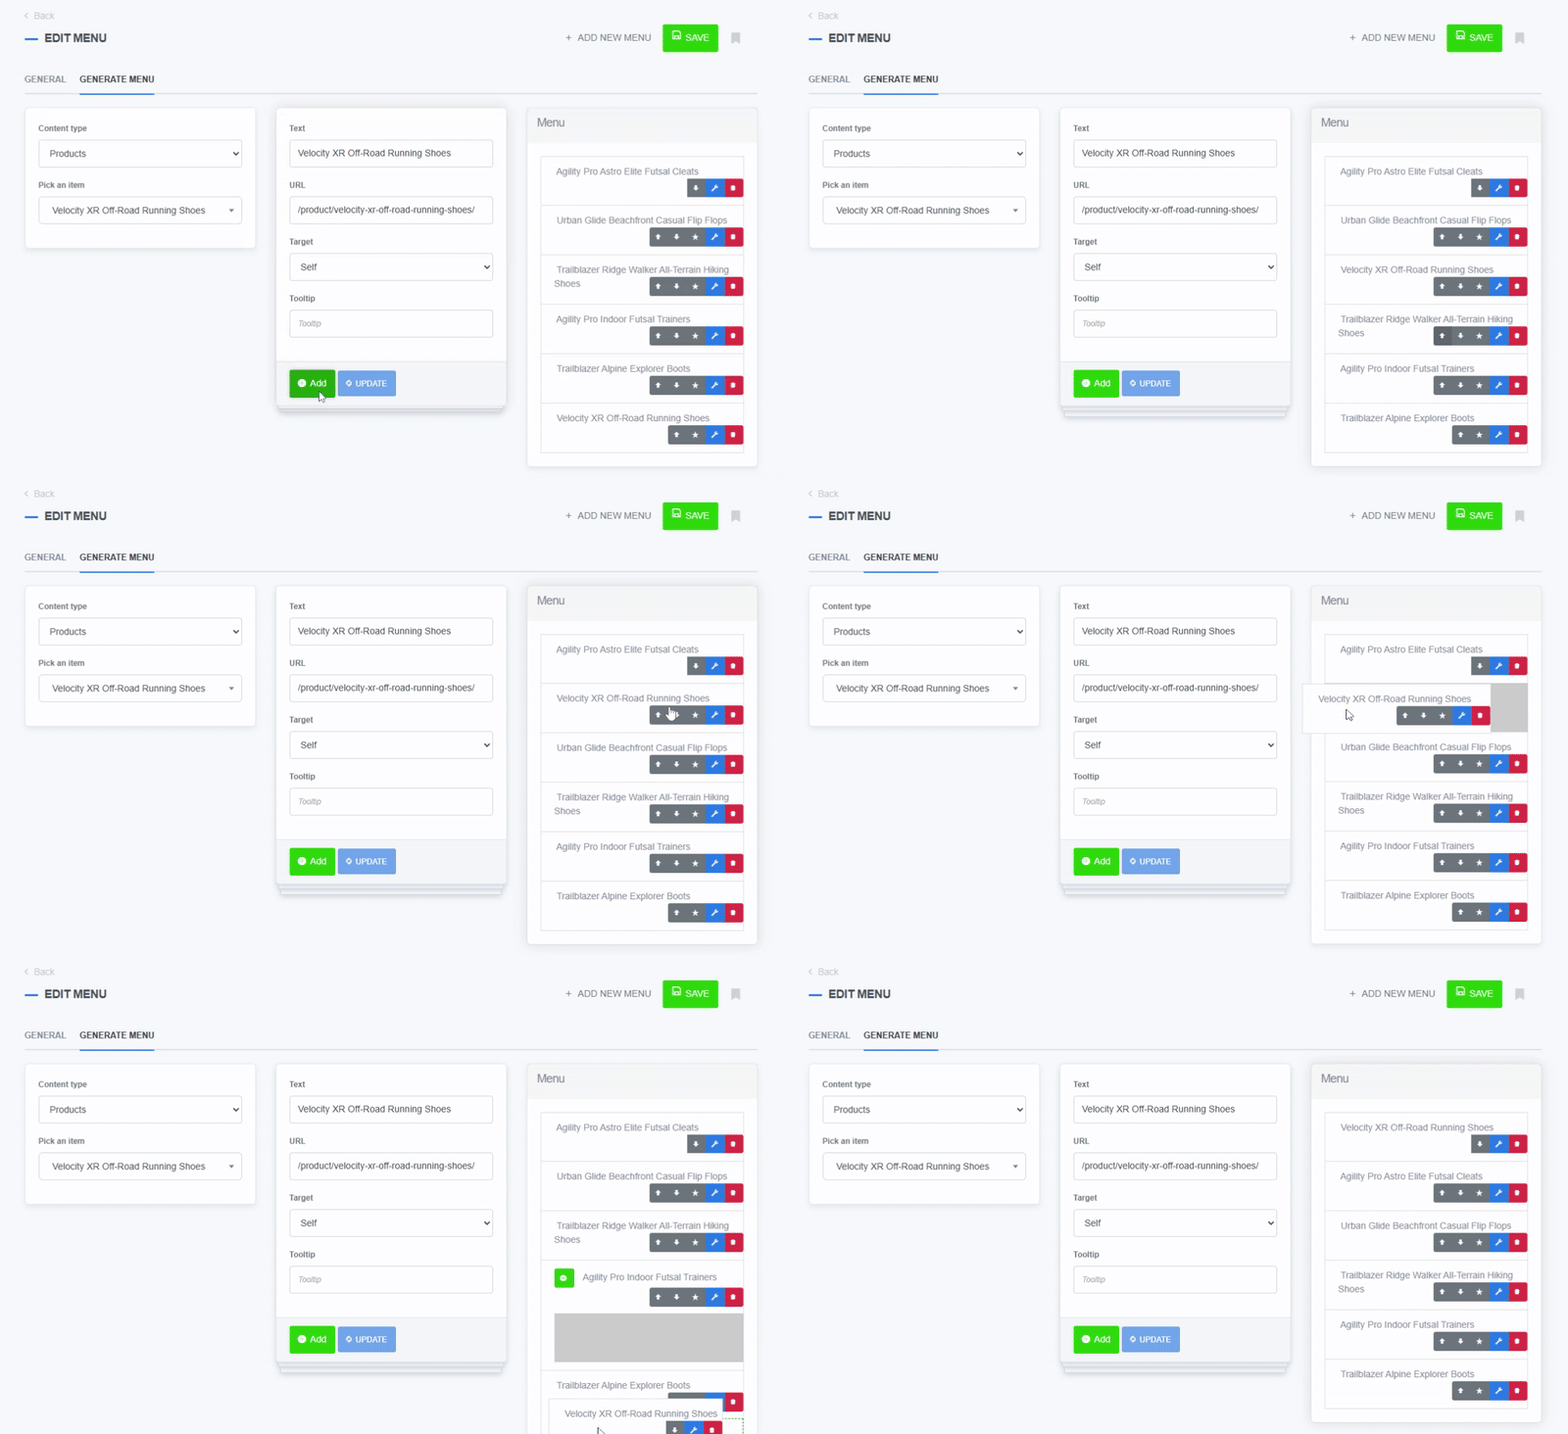
- Edit items: You can edit added menu items by clicking the blue button with the tool icon
- Delete items: You can delete added menu items by clicking the red button with the trashcan icon
- Saving: Click the
Savebutton after you finish adding menu items to confirm the changes
Note:
Menu items must not have the same names, but they can contain the same URLs.
What's next?
Now that we've learned how to add and manage our menus, let's see how to delete the unwanted ones: Deleting menus.
Previous topic: Managing menus