Categories are pivotal in organizing and filtering content on your ReadyCMS. Here’s a simplified guide on how to add and edit them.
How to add categories
Follow these steps:
- Login: Sign in to your ReadyCMS account.
- Navigate: Go to the desired content type and click on ‘+Add category’.
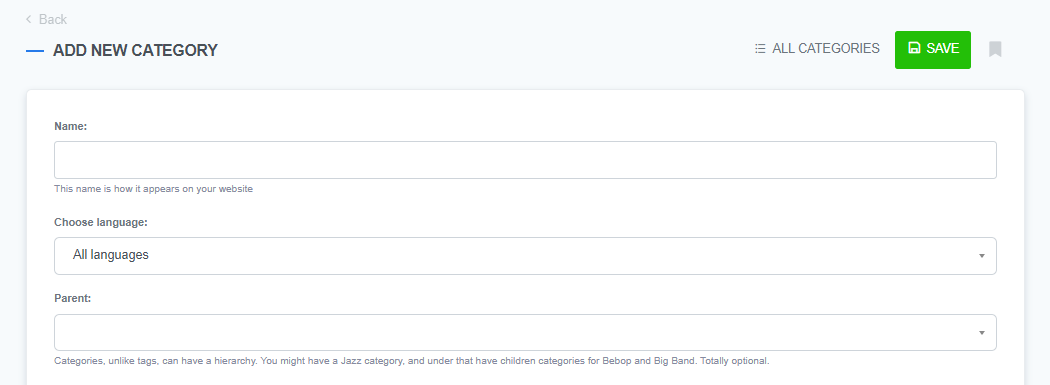
(for example: Shop > Products > Add category) - Fill information: On the ‘Add new category’ page, fill in the required fields.
- Name: Enter the category name.

- Language: Select the language (default is all languages).
- Parent field (Optional): Set the hierarchy of categories.
For instance: You might have a "Music" category, with child categories like "Jazz," and under "Jazz," further subcategories like "Bebop" and "Big Band".
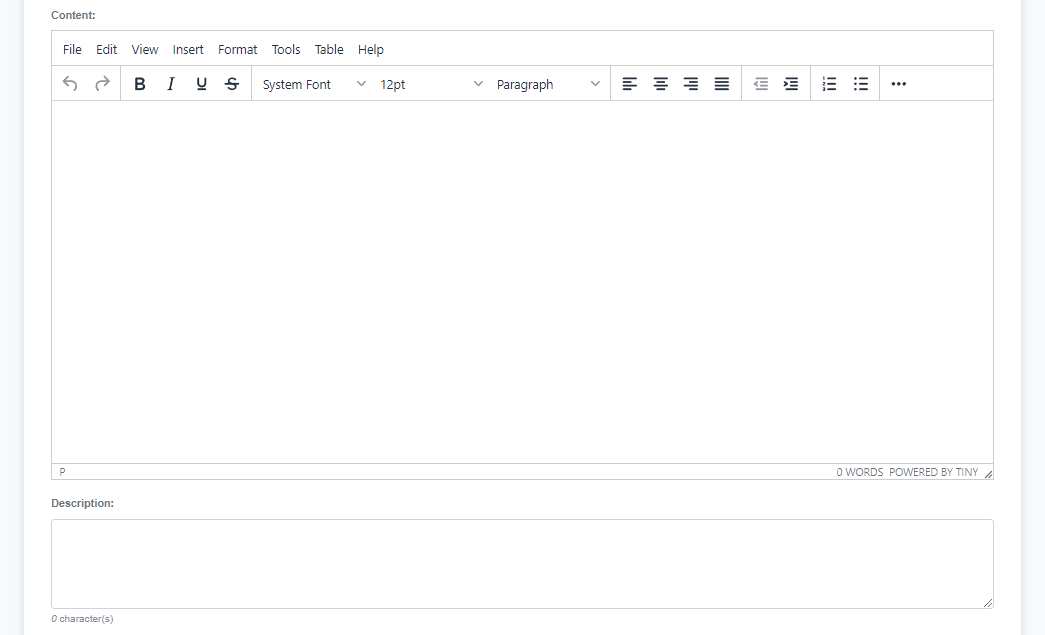
- Content: Enter the category's description.

- Description (Optional): Add a short description.
- Sort field: Assign values for additional sorting options.

- Status: Set as ‘Published’.
- Published (Optional): Set the publishing date.
- Name: Enter the category name.
- Save: Click the ‘Save’ button.
Note: Be mindful of the language setting to avoid creating categories in all available languages unintentionally.
How to edit categories
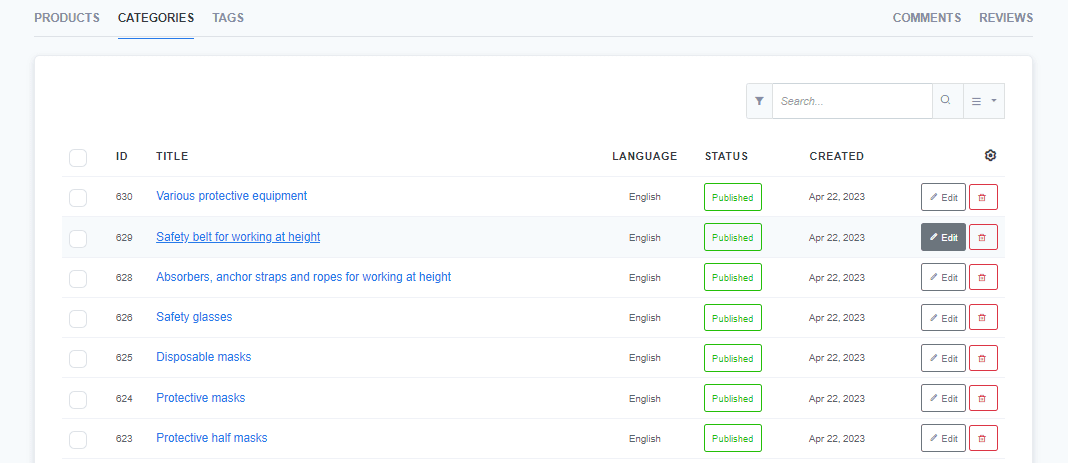
- Navigate: Go to the desired content type, and click on ‘Categories’.
- Select category: Choose the category you want to edit and click ‘Edit’.

- Update information: Make the necessary changes.

- Save: Click ‘Save’ to apply the changes.
Tips and best practices
- Naming convention: Choose names that are descriptive and SEO-friendly.
- Hierarchy: Utilize parent and child categories to organize content effectively.
Example: For an e-commerce site, a parent category could be “Clothing,” with child categories like “Men,” “Women,” and “Children.”